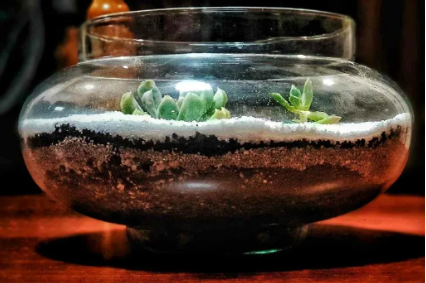
Zen Garden Terrarium
Making a Zen garden terrarium will require lots of careful thought. Zen gardens must make the most of structure and organization, while keeping the harmony of the natural world intact. It is about balance and using stones and sand more than plants to create a feeling of peace in your work.
Step One: Think About Structure
You need to begin by looking at the container you intend to use for your terrarium.
Think about its shape, and the stones that you wish to add to it.
Think about:
- Tall stones to represent the trees
- Flat, rounded stones to represent water
- Sand to represent pebbles
Step Two: Add Your Base
You will need an overall backdrop for your garden.
This will usually be fine gravel or sand.
Choose a color that fits with the theme you want to create. Dark colors can look more dramatic, while light colors are soft and calming.
Step Three: Add the Cornerstones
Once you have a base that you are happy with, identify the biggest components – the cornerstones of your design.
These are likely to be literal stones in this case, although you may have a feature plant that you also wish to include.
Put these stones in place first, and view your garden from several angles:
- Are you happy with them?
- Do they achieve the right effect, or should you move them?
Step Four: Add the Plants
Next, you should include the plants.
You may only be using moss for your Zen garden, but you should still put a layer in at this stage so that the smaller stones fit on top.
Step Five: Build the Zen Areas
Now that you have the basics in place, start to focus on the Zen aspect of the garden.
You will need to take your time over this to ensure that it reflects the meditative spirit of Zen gardens.
Doing it on a small scale can be challenging:
- Mark out your Zen area with small stones if it helps.
- Clear away any moss that has spilled into your Zen area, and ensure that the gravel you fill it with is clean and perfect.
Step Six: Add a Bridge
If you wish to include a bridge, this can easily be made using lollipop sticks and natural string, such as jute string.
You can cut the lolly sticks into planks for the bridge:
- Slice a thin piece of lolly stick.
- Glue each plank to this using hot glue, spacing them a few millimeters apart from each other.
- The thin piece of the lolly stick will hold the planks in place from beneath the bridge.
- The more evenly you can space them, the better your garden will look.
- Cut a toothpick into round posts for the ends of the bridge, and then join these using the string to create a rustic bridge.
You can then place this in your garden where there is a natural hollow.
Step Seven: Finish Off
Take a moment to review your garden and tidy up any parts that you are unhappy with.
Feel the draw of the stones, and make sure that the foliage is not overwhelming their beauty and meditative effect.
If you care to learn further about how workshops are structured at LISAA School of Design, please click below to get in touch with our team.